Scrapbooking Heals

First of all, I want to thank all of you who sent warm and uplifting comments of wishes for good health to me. I read each and every comment sent and those truly lifted my heart – Thank you!

Second, I so sorry about the Halloween card :-( ! I had a doctors appointment that day and it ended up a lot longer than I had imagined. In the end, I was put on complete bed rest until…??? “What, no Cricut? No paper? No Adhesive? OMG – NO EMBELLISHMENTS??????”  This can not be. Yea, ok, get me well but then I’ll be a healthy basket case, LOL! I need to create! So my wonderful DD set up a make shift ‘craft room’ all around my bed! The Baby Cricut is plugged in and placed on a table next to me (I haven’t told you guys about my Expression, did I? She got sick too! It must be going around but I’ll save that for another day). Oh well, I’m in the process of finishing up the card and getting it photographed and I hope to have it up soon.

But what my DD did for me made me stop and think. She has always been there for me, doing those little things that might go unnoticed to make me happy and cheer me up. I want to let her know that those “little” things have NEVER gone unnoticed with me!

In 2001, I had been diagnosed with cancer. It was very hard to hear since my Dad had passed away with it just one year earlier. But I did put it in perspective – I found out after 9/11 and felt extremely blessed because of that. One day earlier and I would have been a complete mess. But it didn’t seen so bad at that point compared to what I was witnessing on the news. I also felt blessed because I wasn’t on any of those planes – I had just taken a early retirement from AA as a Flight Attendant before this happened. Cancer – that’s nothing. I can bet it! And eventually I did! Thank you, Heavenly Father!

During this uncertain time, my DD who was 8 at the time made me a gift that she created with her own little hands. It made me so happy and I had to save it on a scrapbook page. And this is the result, “Through Tiffany’s Eyes I Can See Beyond Cancer”.

Through Tiffany's Eyes

I added her gift to me which was made with cardstock and floss (she had never done any kind of embroidery before this so I thought it was pretty good considering), the lyrics to the song “Through my daughters eyes” by Martina McBride (a beautiful song and very fitting), and a close up photo of her beautiful eyes.

In My Daughter's Eyes page 1

This is one of those layouts that is very personal to me and I thought that I would never share it. But I’ve received some beautiful comments over the last week and in my heart I knew that I had to share this with my new friends. Thank you for visiting and as always Happy Crafting,

Signature

I am giddy with excitement ~ My blog is featured on Two Chics and A Cricut Today!!!

I’m doing my happy dance! (ok, I’m dancing on the inside so as not to break any stitches, lol) but it’s still a very happy dance!
My blog, My Paper Passion, is being featured today (Happy September 1st everyone) on the Two Chics and A Cricut blog!!!! I am trilled that they picked my blog to showcase. I feel so honored, excited, and …. like doing the happy dance again!!! LOL
Check out their wonderful blog at http://twochicsandacricut.blogspot.com/
They have pages about getting started as well as advanced scrapbooking. There are videos and a page on everything Cricut plus much more. Please go visit, look around and follow. Tell them Angie sent you!
I have a Halloween card that I am in the process of putting together and when it’s finished I will post it. It will be today, promise! But until then, I would like to share a Christmas card that I made last year. I love all of the layers and embossing (although the post office didn’t like the bulk too much, lol). I hope you enjoy it.
poinsettia card
And speaking of Christmas (which will be here before we know it!) I also want to share a couple of gifts that I made for my brothers and my mom.
Altered CanvasThis is an altered canvas that I made for both of my brothers. On the left side is a photo of them together many, many years ago. I wanted to place a present day photo of the two of them on the right side but none of us live in the same city and it is so hard to get together these days. But with a little photo imaging software magic, I got the picture that I wanted. Oh what would we do without out computers! Now remember, I am their BABY sister – by very many years! LOL! (I just hope they don’t read this post!)
CalendarThis is a calendar for my dear mother. Since she is getting up in age, I included everyone’s birthday and anniversary’s in it and also put old photos on each months page. That’s my mom on the cover when she was in her 20’s.
I hope you enjoyed looking at some of my older projects and maybe get some ideas for this years gift giving. I’ll get that Halloween card up as soon as I can.
Thanks for looking and as always, Happy Crafting!
Signature

Do you want the good news 1st OR the bad?

Well, I think you guys deserve the GOOD stuff first!
Last weekend I had a fabulous time in Fort Lauderdale, FL. PC sent me there to demo at the grand opening of a Michael's on Sunday! The weather was good, and the people there were so welcoming. The grand opening was a big deal to those Floridians! We had balloons, ribbon for the ribbon-cutting ceremony, fire trucks, a DJ spinning his tunes, the mayor of FLL, and then there was ME! I took my samples and (too many) cartridges. Everyone was so nice & very eager to see the Cricut Expression in action. Many had only seen it on those infomercials on TV! Boy did we sell Cricuts that day! Even saw some Gypsys & carts go by. It was a great weekend and I am so thankful that I got to experience that! I have photos but I'll have to wait until I get home to post them - but I won't forget!
That brings me to the not-so-good news. I am in the hospital now - the heart & vascular wing of the Medical Center of Arlington. I don't know a lot yet but with hope & prayer I will have some good news soon. And I have some great projects to show you when they let me outta here!
I'd like to ask for your prayers & thoughts as I walk through this trial.
"If He leads me to it, He'll get me through it."
Thanks to all of you & Happy Scrappin'
Angie

Can You “Imagine”?

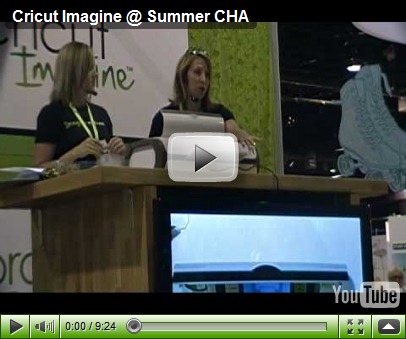
Here it is folks – the new machine that Provo Craft just announced at CHA last week. It is called the Cricut Imagine. If you took our beloved Cricuts and merged it with a great color printer, this is what you’ll get! You’ll be able to cut AND PRINT! It will have it’s own cartridges but it is fully compatible with our existing cartridges as well.

image Take a look at this video and let me know what you think.

Cricut Imagine - CHA

Please leave a comment below. Thanks for looking.

Happy Crafting!

Signature

Canvas Project and a Recipe Box

Happy Tuesday! Today I am going to share with you two different gifts that I made for my sister-in-laws. I love making hand-made gifts for family and friends. It’s just so much more special.

The first one is for my sister-in-law who used to be a nun. Yes, a nun! And, no, my brother had nothing to do with her leaving, LOL! She entered the convent at the age of 13 and stayed for over 10 years until she just felt it wasn’t for her anymore. She has now been married for almost 40 years and has two wonderful kids (well, not kids anymore and I am a little biased, LOL!). So I made an altered canvas for her called ‘Devine Intervention’.

Devine 1

I wanted to show that no matter which path we take in life we all end up exactly where we are supposed to be.

I inked the sides of the canvas and then covered it with paper from My Mind’s Eye (Love that paper!), added my photos, some rub ons, metal, letter stickers, a laser cut rosary, Devine 2

and the word ‘Devine’ that I cut out by hand with my Cutter Bee blade. Devine 3

I know that we all love our Cricuts and the many wonderful fonts that it can cut but if you ever want to cut a word from a favorite computer font here’s what to do in your word document:

  1. Type out your word in the font and size that you want
  2. Go to Format>Font>Effects and click Outline

Now that you have your word in Outline it’s time to print.

  1. In your Printer dialog box click Properties and look for a checkbox or dropdown box that mentions “T-shirt”, “T-shirt Transfer”, “Mirror”, or “Mirror Image” (remember that each printer software is different)
  2. Print on the back or wrong side of your cardstock or paper
  3. After printing, use a sharp blade (x-acto, etc) and a cutting mat to cut out your word (although I love my glass mat much better for this – the blade just glides over it). Printing and cutting the word out from the back means you don’t have to be so precise  - if you mess up a little, no one will notice!
Yea, it sounds like a lot of work but sometimes you just have to have that certain font that goes just right with your layout! Now you can!

The other gift that I made was for my SIL who loves to cook. So I made an altered lunch box for her recipes.

Recipe Box 1

The paper that I used was from one of those stacks that I’ve had a while and now I don’t remember the name of the company (if you recognize it please leave a comment!). I also used some Prima flowers, some chipboard, and lots of ribbons.

Recipe Box 2

Recipe Box 3

Thanks so much for looking! Until next time Happy Crafting!

Signature

Project using Vinyl & Glass Etching

Happy Monday Crafters! I hope everyone’s weekend was a good one. I want to thank all of you for visiting my little blog and leaving such wonderful comments. Yes, I read each and every one of them and they all have been incredibly kind and I promise that I will try to always keep this blog updated and fresh!

Now for today’s project. I wanted to play with the glass etching cream that I bought awhile back but never used. I used my Provo Craft vinyl to cut out my initial with my Cricut Expression and the Storybook cartridge. I set my pressure to 3 and my blade depth to 2. You only want to cut the vinyl and not the paper backing.

Glass EtchingSorry about some of the photos – it’s very hard to photograph glass! I used the positive A and placed it on this simple glass vase. Then I took the negative part of the vinyl and centered it on another glass vase, taping off the top, bottom, and sides with painters tape. I used a foam brush to smooth on the etching cream and left it one for about 5 minutes. When the time was up I rinsed off the cream and took off the tape and vinyl. This is the result:

Glass Etching2It came out so much better than I expected! And so easy to do. I can see making things like this for the home, for wedding gifts – the possibilities are endless!

Glass EtchingThe vases were bought at Michael’s on sale for $2.50 each! Not a bad deal. I also bought the etching cream at Mike’s with a coupon so it was about 8 dollars. But a little goes a long way.

I’ll try the glass etching cream again and next time I’ll get photos of the process step-by-step! 

Until next time, Happy Crafting

Signature

Baby’s First Year Mini Album

Here is a mini album that I created for a baby girls first year. It has a page for the birth, each month of the first year, and a place for that one-year-old photo shoot. There are 18 pages with a lot of hidden places for extra photos, tags, and journaling. I didn’t even use a pre-made album – everything was hand made. The front, back and spine are all covered with fabric. I loved making this album so much that it was very hard to part with it when I finished. But I put it up for auction on Ebay where it (hopefully) went to a loving home.  I hope you enjoy it.
Happy Crafting,
Signature

LinkWithin