This is the Origami Mini Album that I posted on my blog last month but I didn’t give any details about it. So I finally did this tutorial for you – just a little late but I hope that you enjoy it! These are really easy to make and they make very nice gifts. I made several as little Mother’s Day gifts for friends a few years ago.

You’ll need:
- Two pieces of chipboard – 4”x4” each
- Four pieces of patterned paper – two @ 4.5”x4.5” (the floral paper in my photos) for the mini album covers and two @ 3 7/8” x3 7/8” (the green) for the inside covers. I used double-sided paper from the Sweet Nectar stack by K&Company
- Wide ribbon – about 2 feet. I just used some wired ribbon from my stash
- Three pieces of cardstock – 8”x8”
- Strong adhesive – I used my trusty ATG!
- Any embellishments of your choice for your pages – Used my Cricut of course!

ok. let’s start! Put your adhesive on one side of both pieces of your chipboard. Place these, adhesive side down, centered on the 4.5x4.5 pieces of the patterned paper like the example on the right side in the following photo.

Cut the corners off of the patterned paper almost to the tip of the corner of the chipboard. (Don’t cut the patterned paper all the way to the corner of the chipboard!)

Now put adhesive on each of the four sides of the patterned paper ‘tabs’ that you just created and then fold them over onto the chipboard. This makes really nice mitered corners.

Now take the smaller two pieces of patterned paper (the 3 7/8” by 3 7/8” squares) and place adhesive on them making sure that they get a good coverage of adhesive, especially on the edges, corners, and center. You are going to have to use your imagination for this part! I forgot to take that photo and didn’t realize until now – after the album is glued together! Sorry!
You have just created the covers for your mini album! Now on to the inside and the ‘origami’ folding using the three pieces of cardstock. I did take photos of this part – I promise. This part uses just 3 folds per piece! I used a scoring board to make the folding easier. Trust me, it really does help to have one of these! I actually have two – the Scor-Pal and the one by Martha Stewart shown in the photos. A bone folding tool also helps by making your folds nice and crisp!

First, score and fold the first piece of cardstock in half diagonally…

and use your bone folder to crease.

Open the folded cardstock, and turn it over and make the next two folds in the opposite direction. (This will make sense in a minute). Now fold in half from side to side like this:
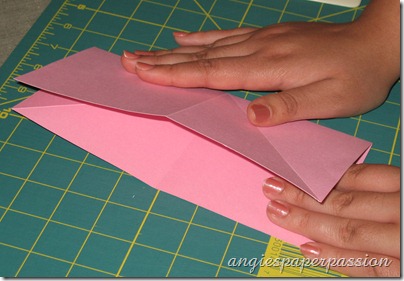
Now unfold and fold again in half from top to bottom. Unfold again.
Now when you press the two opposite creased corners in towards the center…
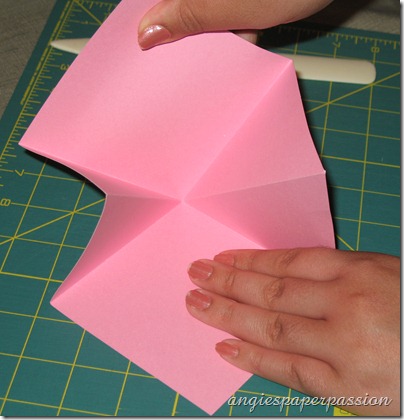
the other two corners will automatically collapse together…

Don’t forget to use your bone folder on all folds!
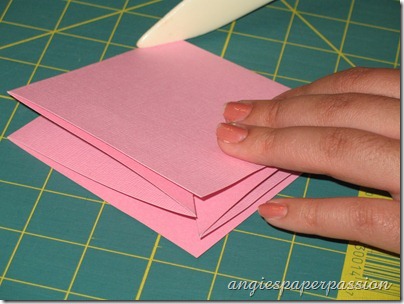
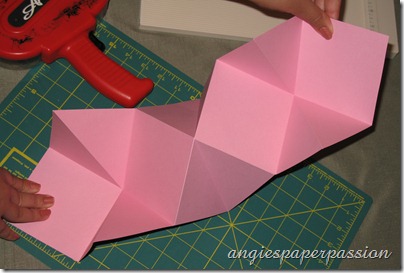
Repeat these steps with the other two pieces of cardstock. You are now going to adhere the three pieces together. Put adhesive on one of the folded pieces (again making sure to put adhesive close to all edges, corners, and good amount in the middle – you don’t want your mini to fall apart when it is opened!) and adhere two together with the ‘openings’ facing in opposite directions…

Adhere the third piece next with its ‘opening’ going in the same direction as the first, or bottom, piece of cardstock. I hope this all makes sense, lol! Your three pieces should look like this:

Now, let’s put it all together! With the inside pages all folded, put adhesive on one side (again, don’t skimp on the adhesive!)…

and place one of the covers on top, eyeballing the placement and making sure that the cover is centered on the ‘pages’…
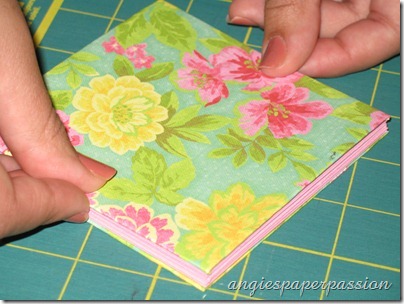
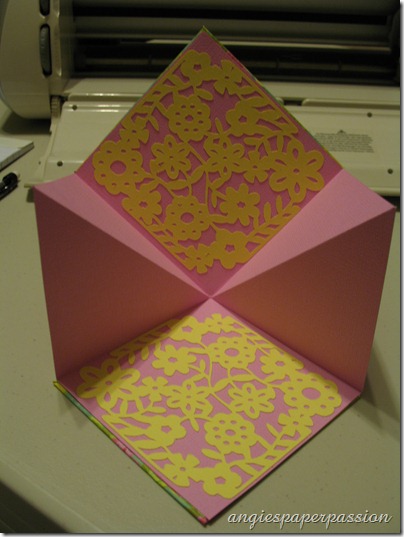
Turn your album over and repeat, adhering the second cover. When you open your mini album, it will look like this…

and this…

You now have six 4”x4” square pages to place photos or journaling – four on one side and two on the other side when you turn the album around. There are also 12 squares that are folded in half giving you 24 triangles to embellish! Those triangles are great for journaling! For the closure, I used my wired ribbon to wrap around the mini and tied it into a bow. I love the wired ribbon because it holds its shape. This way you can just slip the ribbon off the mini without having to untie it! I used the Paper Lace cartridge, my Expression, and Gypsy to cut out the same image that I used on the front of my glass block in a previous post and just cut two in a smaller size and adhered them to a couple of the inside pages. I plan on embellishing the inside some more before I give it as a gift!
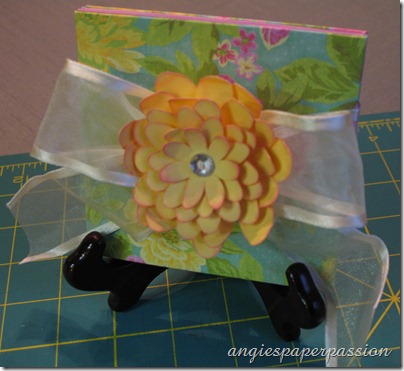
Here is my final mini album -

I can’t seem to stop making paper flowers lately! So I just had to make another one of my 8-layered flowers, with some bling added, and adhere it to the ribbon:
I hope that you give this a try enjoy creating your own Origami Mini Albums! If you have any questions please email me. Thanks for visiting!
Until next time, Happy Crafting,





%5B3%5D.jpg "Origami Album (1)")
%5B5%5D.jpg "Origami Album (2)")
%5B13%5D.jpg "Origami Album (2)")
%5B10%5D.jpg "Origami Album (3)")
%5B3%5D.jpg "Origami Album (29)")
%5B5%5D.jpg "Origami Album (30)")
%5B5%5D.jpg "Origami Album (31)")
%5B5%5D.jpg "Origami Album (32)")
%5B5%5D.jpg "Origami Album (33)")
%5B5%5D.jpg "Origami Album (8)")
%5B3%5D.jpg "Origami Album (35)")
%5B5%5D.jpg "Origami Album (36)")
%5B5%5D.jpg "Origami Album (40)")
%5B5%5D.jpg "Origami Album (41)")
%5B5%5D.jpg "Origami Album (43)")
%5B3%5D.jpg "Origami Album (44)")
%5B5%5D.jpg "Origami Album (45)")
%5B4%5D.jpg "Origami Album (46)")
%5B4%5D.jpg "Origami Album (12)")
%5B9%5D.jpg "Origami Album (49)")
%5B5%5D.jpg "Origami Album (53)")