Color Hues Yellow & Pink Challenge #23 and Honey Bee Stamps Coneflower

Hello Crafters! I've decided to take on a few card challenges and the first one is over at Color Hues. Their challenge is to use Yellow & Pink as the focal color.

As soon as I saw this challenge I knew immediately that I wanted to create something with my new Coneflower dies from Honey Bee Stamps! I love this set and it's so hard to not want to grab it each time that I want to make a card. Here is my card!


I die cut the flower from Gina K Designs heavyweight white cardstock and blended GKD Wild Dandelion, Sweet Corn, Prickly Pear, Dusty Rose and Passionate Pink inks onto the six different layers of the flower and adhered them together. I popped the petals up using pop dots. 


I used a stencil from A Colorful Life Designs and two of the yellow inks to make my own background for the card. I cut three large and three small frame dies from PinkFresh Studio and adhered them together for a little dimension and placed them on my background panel and used pop dots to adhere the coneflower in the middle. The sentiment is a stamp and die also from PinkFresh Studio that I heat embossed in gold. Gold just seemed to compliment the GKD Kraft cardstock that I cut my frames from. To finish it off, I added some yellow & pink gems from Queen & Co.

This is my first time playing along with the color challenge at Color Hues and I can't wait for their next challenge! 


I'll be posting more cards that I made for challenges this weekend so until next time, Happy Crafting!


Christmas Cards in July using Gina K. Designs

For the next set of cards that I created I used Gina K Designs Sparkle and Shine stamp set. This is a wonderful set that includes the images below plus a round ornament and Christmas tree. I stamped the image and sentiment in VersaMark and embossed it with silver embossing powder (on light blue cardstock) & gold embossing powder (on red cardstock). I die cut the sentiments and adhered them with pop dots to the 'ornaments' then die cut the card panels and layered them onto silver and gold cardstock. I used GKD master layout dies. I then added sequins to the fronts.


Thanks for visiting my blog - I hope that I have inspired you to create something! 
I have a few more Christmas cards that I will share in my next post!

Until then, Happy Crafting!

Christmas in July Cards using Gina K. Designs

Here is my next set of my Christmas cards using Gina's Holiday Tapestry stamp set. This set is so versatile! Although it's a Christmas set the tapestry images can be used all year. Again I embossed the image and sentiments in gold & silver and layered the card panels on gold & silver cardstock. I also made some gold embossed images on red and gold cardstock but I didn't get photos of them. Gold and silver sequins were also added.


  Thank you for visiting my blog. I have a few more Christmas cards to share with you soon!

Until then, Happy Crafting!

Christmas in July Cards using Gina K Designs

Hello Crafters! Since we only have six months until Christmas (gasp!),  it's time to start working on this years cards. But first I wanted to post the cards that I made in 2020 since I hadn't before. I made roughly 45 - 50 cards last year for not only friends and family but also for a card swap for members of a Facebook group that I belong to. I made 4 different card designs changing the colors slightly for each design.

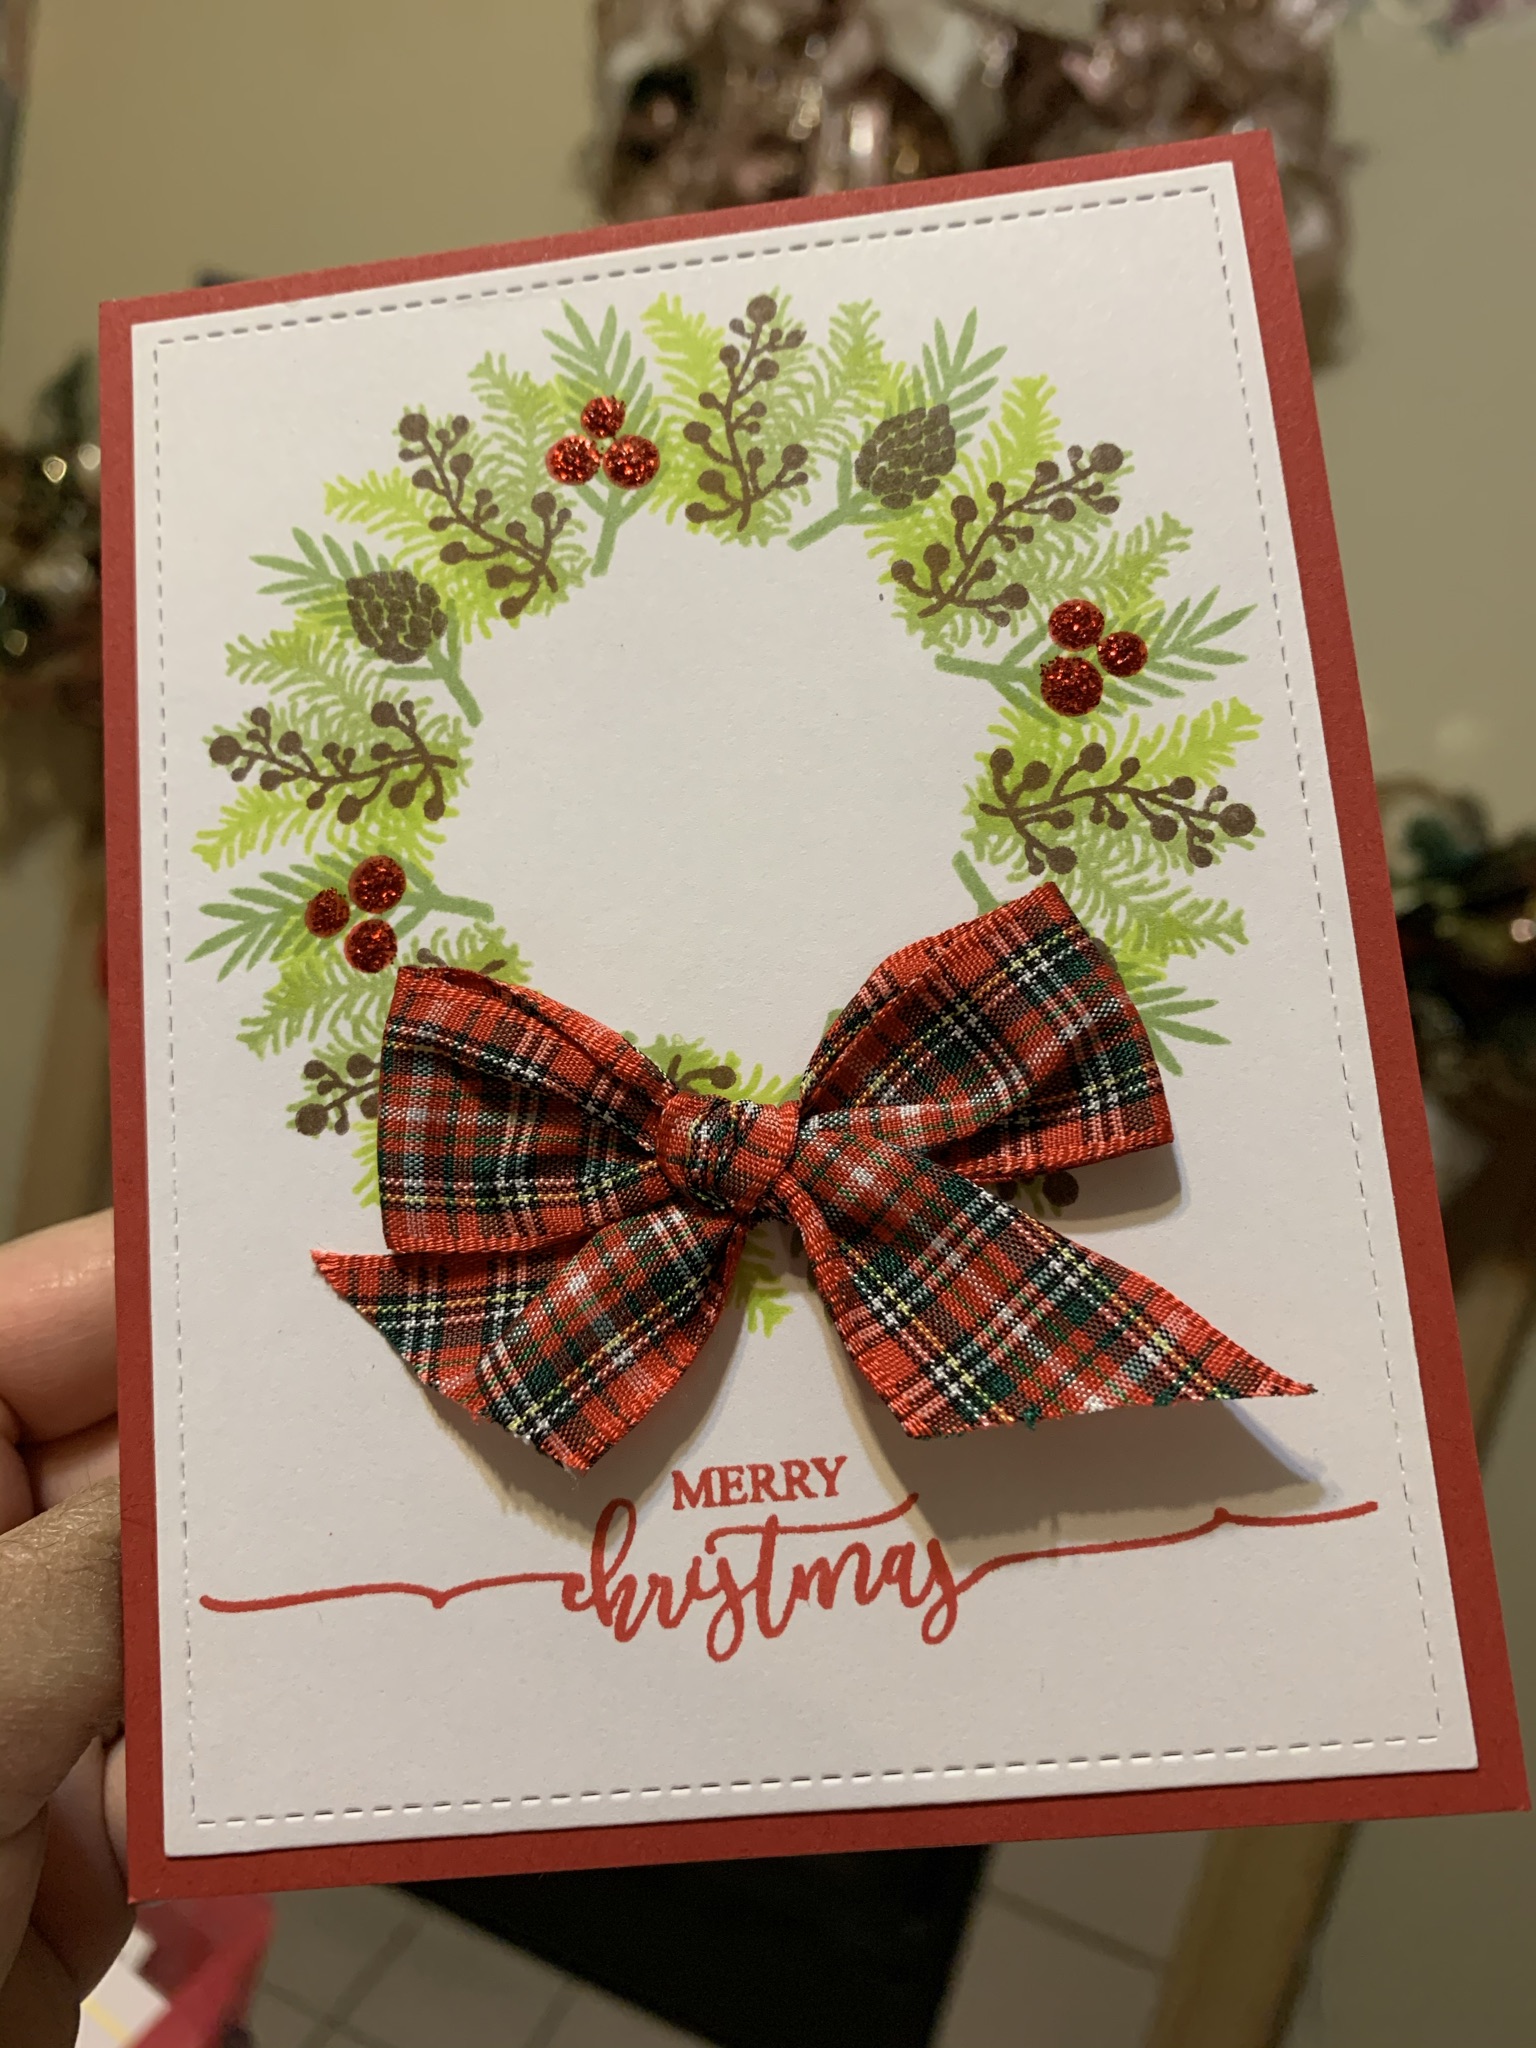
This first one is probably my favorite! I used Gina K Designs Wreath Builder template, Holiday Wreath Builder stamp set and the Scripty Holiday stamp set. Using the wreath builder makes creating cards so simple! Once I knew which stamps I wanted to use and a design that I was happy with, I made the first card. After that first one was complete, the rest were easy and I made them all while watching TV. 


I used two different ribbons from my stash and red Stickles for the berries.


Below is my work in progress using the wreath builder:


This was one of my favorite Christmas cards that I created last year and 
I may use my new Gina K Wreath Builder for this years card!


Thank you for visiting my blog. I hope that you found some inspiration here. 
I'll share some more of my Christmas cards in my next post!

Thank you so much for visiting!
Until next time, Happy Crafting!


A Quick Lawn Fawn Magic Picture Changer Card

Today while I was packing up a big box of crafting supplies to send to a dear friend of mine I decided to make her a very quick card. I pulled out a die set that I haven't used in a few months (well, cause of being shut in for a while, I may not have used it since last summer but I really have lost all sense of time, LOL)! I still believe that this set is so amazing and very versatile. I've created cards with cutesy images, floral images, and even actual photographs — which the recipients have loved! But this card was just a quick one to show my friend how incredible the mechanics of this die set is so.

(I am telling you up front that my paper choices aren't that good; one or more are just screaming at me. But the glue had dried and so I stuck a fork in it & I'm calling her done😂!)


I knew two things: I wanted to use the Magic Picture Changer die and I wanted to use the My Favorite Things I Miss Your Hugs stamp set. I bought this stamp set last year but never pulled it out until today. There are a lot of sentiments that can be used not just because of the pandemic but anytime you just haven't seen someone in a while. The world from the MFT stamp was stamped with Tim Holtz Distress Oxide Inks in Tumbled Glass and Peeled Paint. I found that the Distress Oxide Inks laid down much nicer, the colors were smooth and very even on the paper and they didn't bead up like some dye inks that I tried especially on the solid round blue world. The sentiment was stamped right over that in Chipped Sapphire Distress Oxide Ink. 


All of the patterned paper is from a 6x6 pad from Authentique. My intention was to cut one layer for the top of the base cardstock but I picked up a FRAME die by mistake & die cut my chosen favorite paper. After I realized that I grabbed the wrong die, I also realized that the patterned paper that I had picked out  was the last one in the pad - so there goes the only sheet that I had! My second pick was the dark blue swirls patterned paper but after I adhered it to the base I was not happy with it. In frustration I grabbed the frame die pieces that I had die cut by mistake and used the back of the inside piece (you know the part that we usually throw away😜) and put it on top the first layer of the card base. And you know what, it's not that bad! The blue swirl paper is die cut with Lawn Fawn Outside In Stitched Rectangle Stackables and the light blue piece is die cut from My Favorite Things Die-Namics Stitched Rectangle Scallop Frames.

Now for the 'Magic': 


You see "Wish You Were Here" when the tab is pulled! I admit that once these types of cards are finished I can't help myself from pulling that tab in & out several times (almost like playing with a new toy!) just in awe of how cool it is and how easy it was to make it! They really are fun and addicting to make. 


The sentiment that I chose for the inside of this card is also from the MFT's stamps set and says, "When I Do Get To Hug You, Prepare For A Hell Of A Squeeze"! And I stamped "A Paper Hug For You" on the back of the envelope flap!
My friend will get a kick out of this and I hope that you, too, enjoyed my card today! 

So Until Next Time, Happy Crafting,

Foiled Butterfly Slimline Card

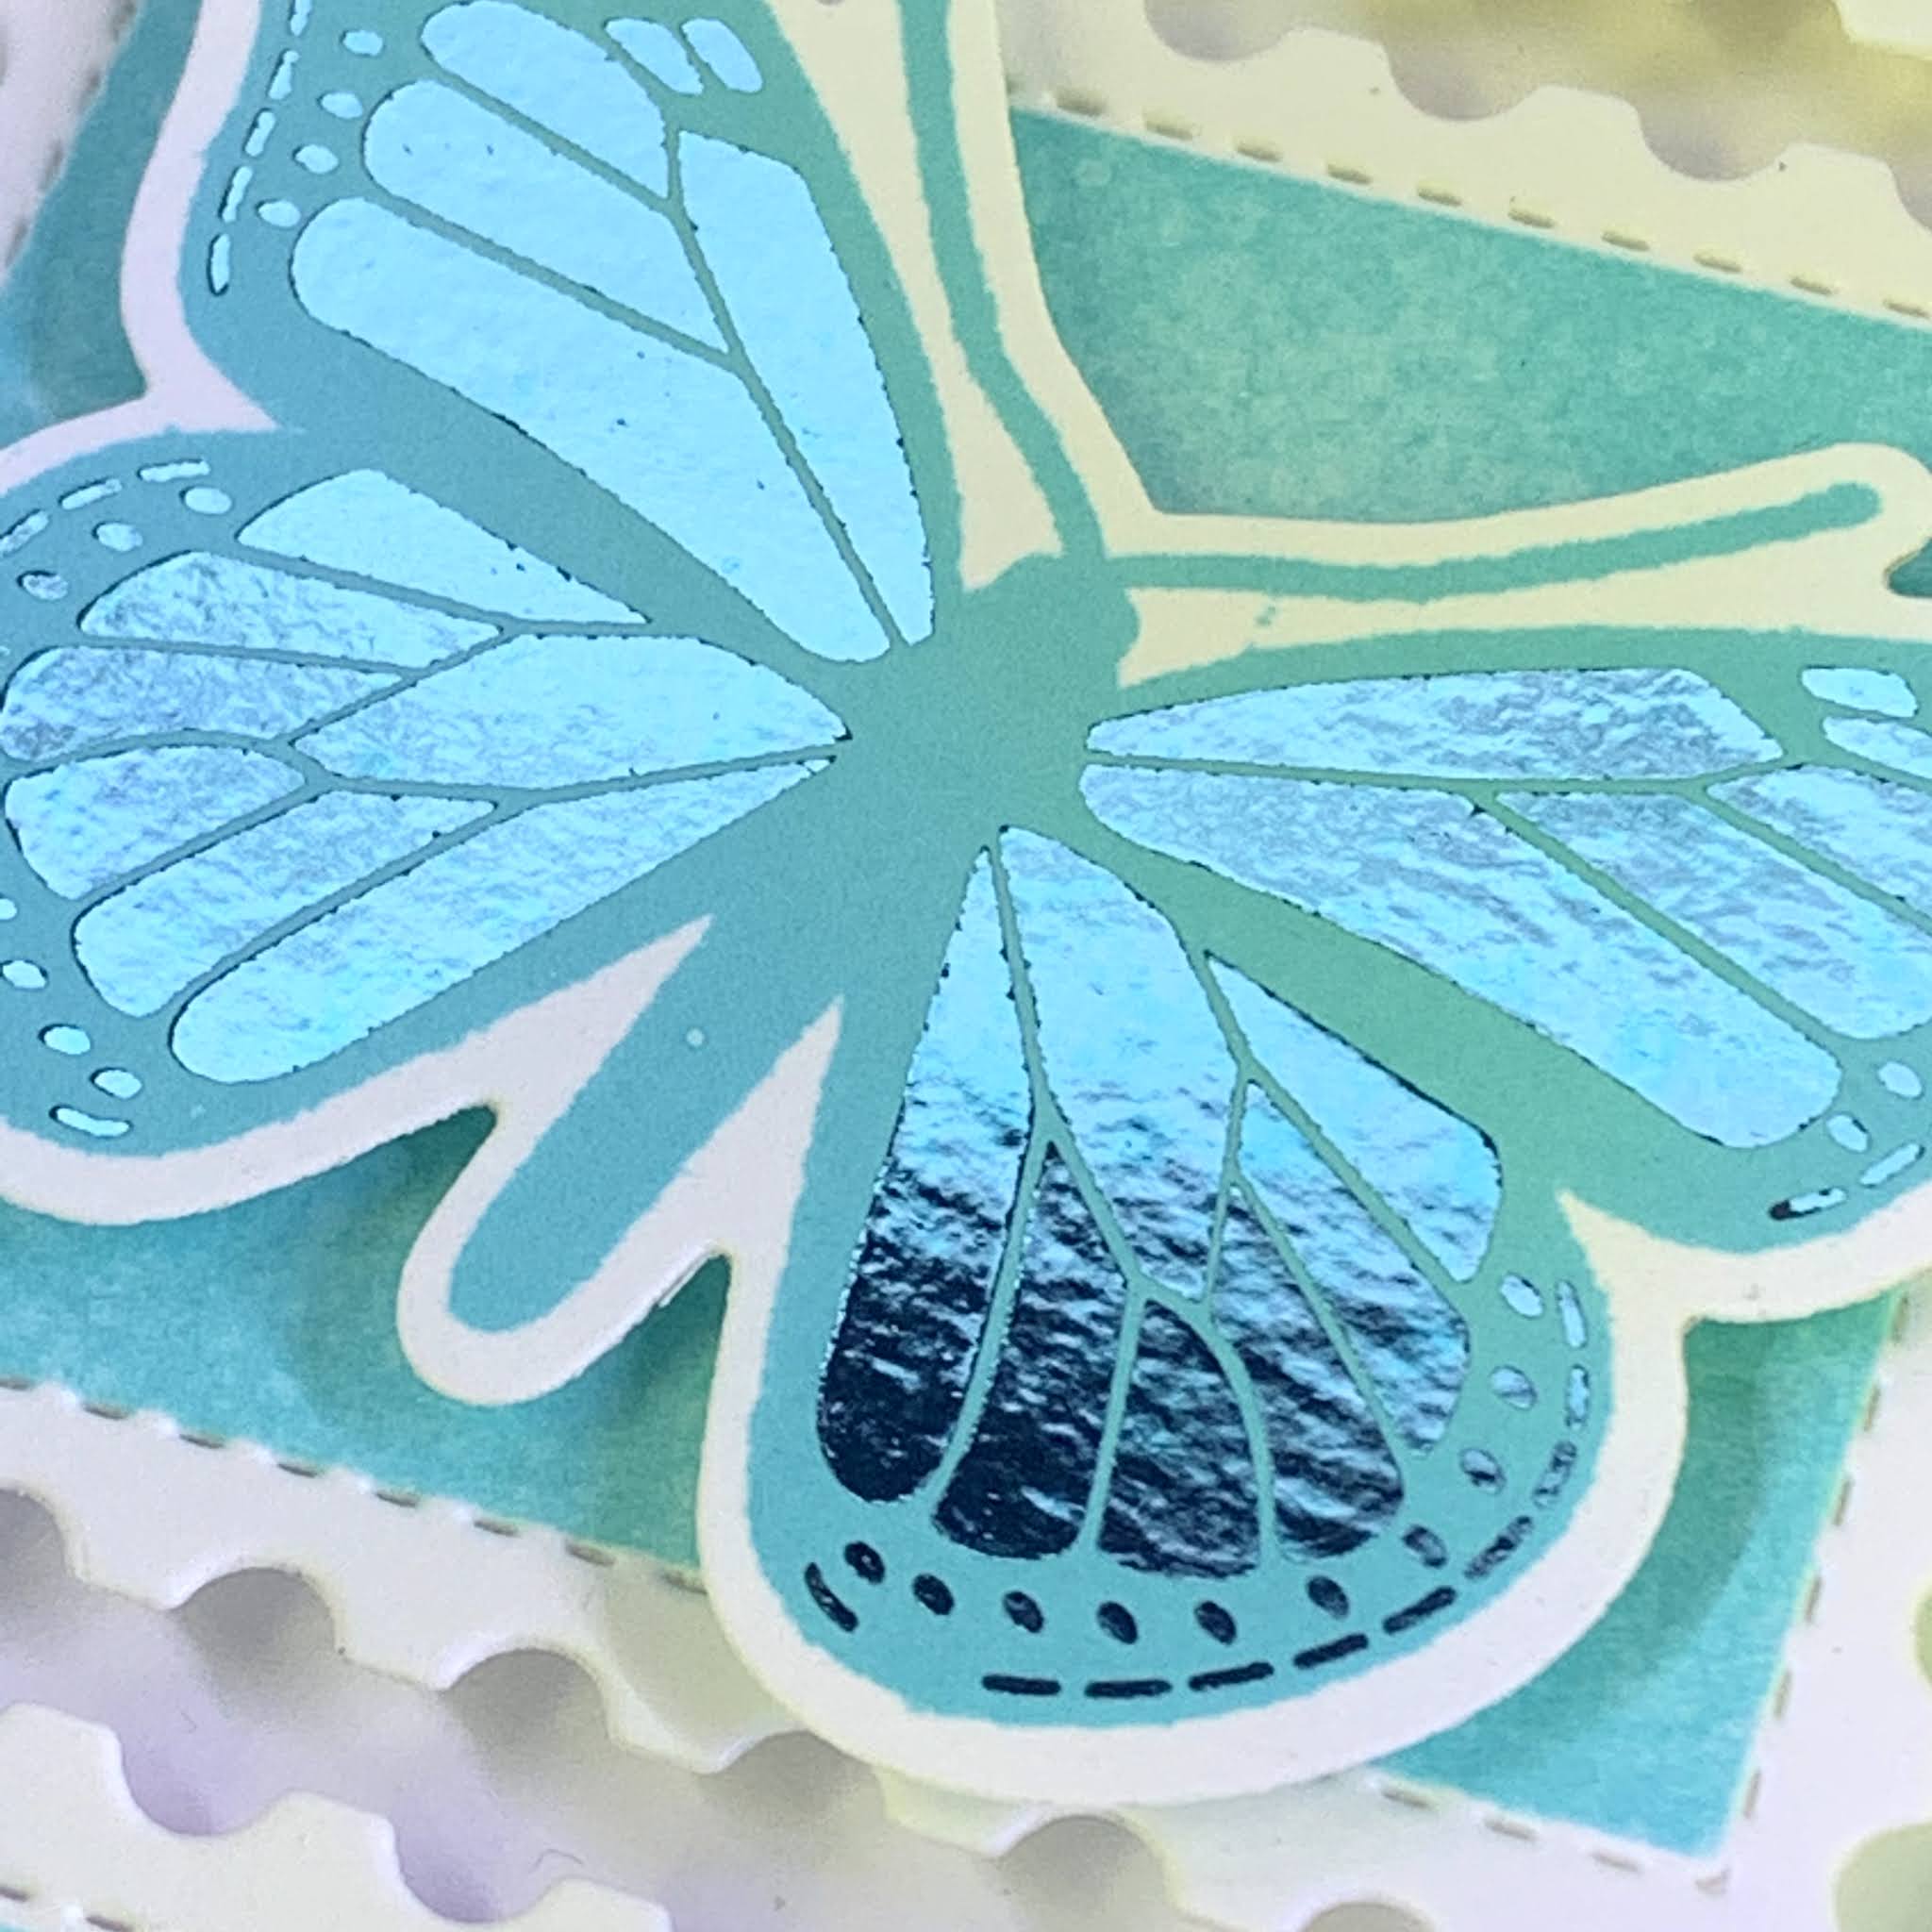
 Hey Crafters! Today I have a card that I created for the Beautiful Butterflies Mod Squad Challenge. This challenge gave me the chance to use a new (to me) product - Gina K Designs/Therm-O-Web Stamp N Foil Foil-Mates Detail Sheets. I recently purchased a laminator, toner sheets, and a lot of foils! These Foil-Mates are called Butterfly Kisses and also has a stamp set and die set that comes separately (but of course I had to have them all!)


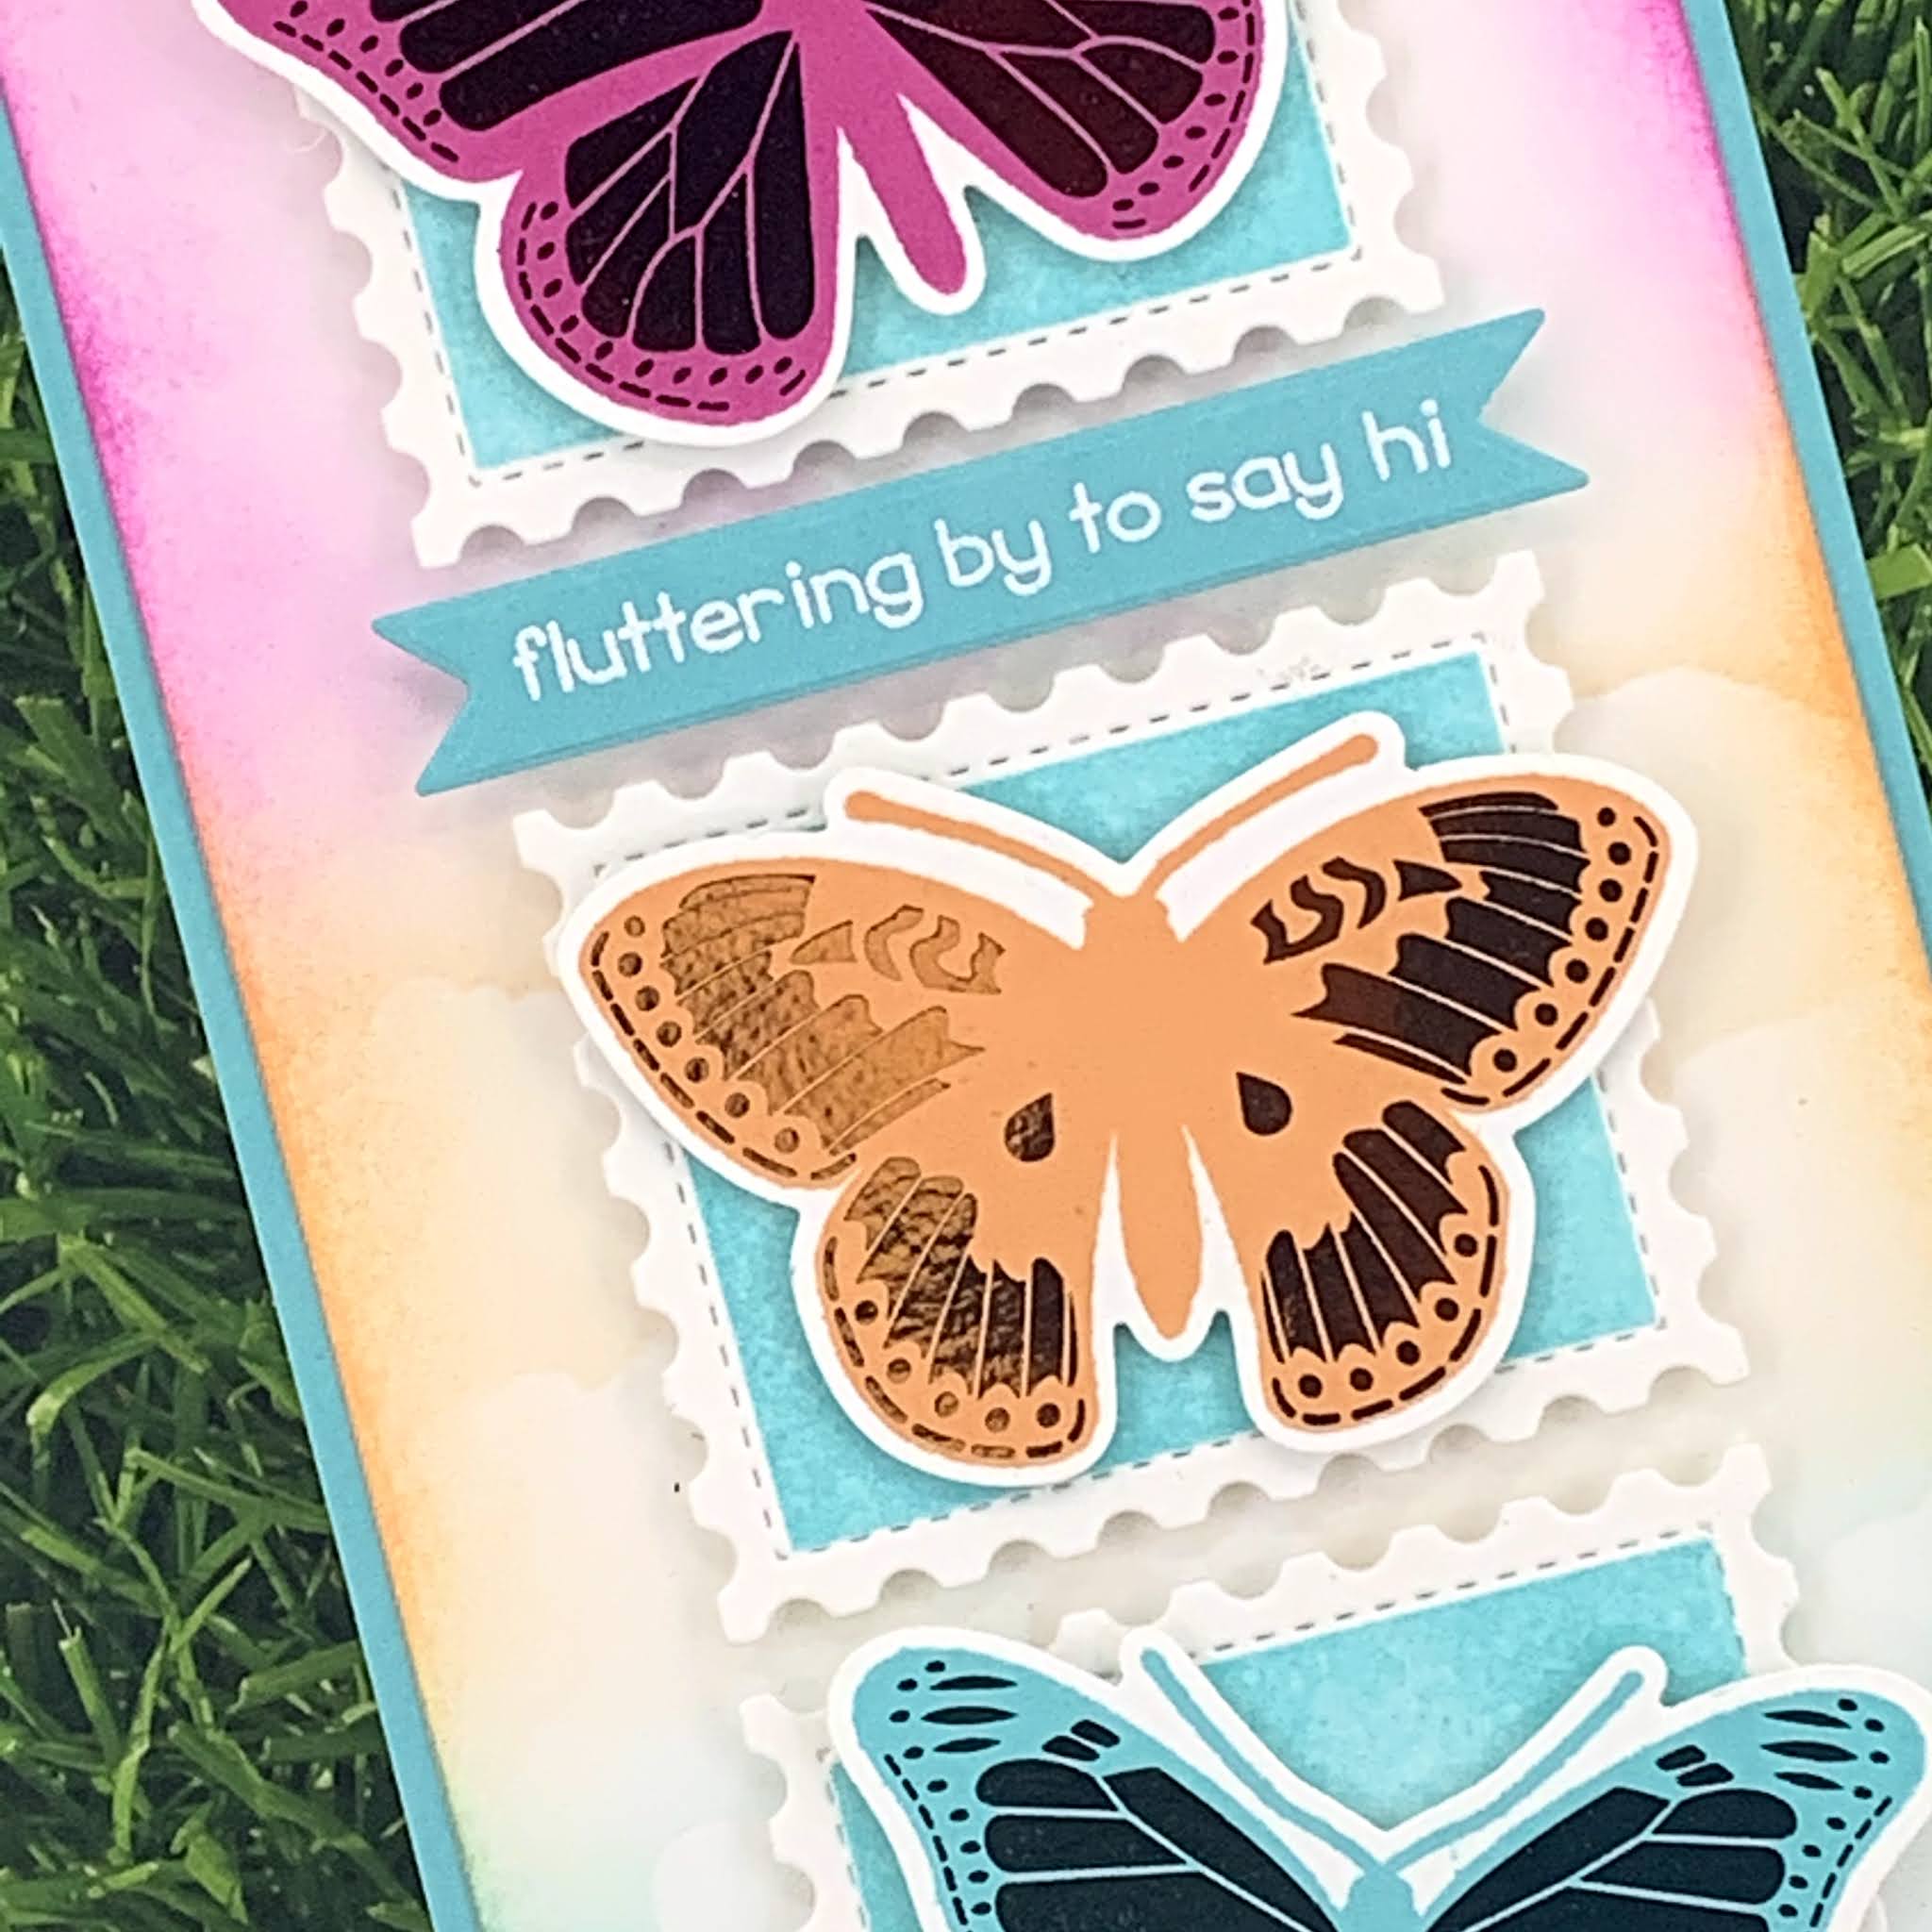
I decided to make a slimline card so I could put more of those butterflies on my card. I ink blended four colors onto my card front - Gina K's Passionate Pink, Sweet Mango, Turquoise Sea and Wild Lilac. Part of the butterfly wings come ready to foil but I stamped them in the same inks that I used on the card front and then I ran them through my laminator with the same color of Gina K Fancy Foils. It is so hard to see the beautiful and shiny foil in photographs unfortunately.


I used a sentiment from Lawn Fawn Butterfly Kisses (just a fun coincidence that both companies have the same name!) and heat embossed it with white embossing powder from Gina K. 


I die cut the sentiment and the postage stamp shape from Gina K Designs Master Layout #4. All of the elements are popped up on pop dots. 

I hope that you like my card for today! My new laminator has been getting a workout and I will post more cards that I've made using foiled elements and more info on the laminator itself. I will be adding this card to the Mod Squad Challenge! Thanks so much for visiting!

Until next time, Happy Crafting!

Cityscape Birthday Card

Hello crafty friends! It's been a few months since I last posted anything. There was Christmas, a Christmas card exchange (I made 30 cards for that plus even more for family and friends!), getting both vaccines (YEA!), and then 'Snowmageddon' here in North Texas 😖 and we had to find warm accommodations since our home had no electricity and no heat for several days! But now I'm back in my craft room and crafting away!

These City Landscape dies from Impression Obsession has been in my stash for quite some time and I decided that it was time to use it! It reminds me of the year that I lived in NYC. For this card I needed something a little more masculine so I kept the colors muted and I also wanted to create a slimline card. These are so much fun to make and they have a lot more 'real estate' than the smaller A2 cards! I used Tim Holtz Distress Inks for the background and used the Tim Holtz Distress Sprayer to spritz some water droplets on it. The die was cut a few times in each color to stretch it out across the bottom of the card. I added strip sentiments from Simon Says Stamp (so quick and easy) and two enamel dots at the bottom. There are also Clear Droplets from Kat Scrappiness scattered through the sky.


I am entering this card in the following challenge: 

ModSquad Challenge - Fairytale Castle: The challenge is to incorporate a building or some type of architecture. 

Thanks for visiting and until next time, Happy Crafting!

LinkWithin